
Mount a pedal to its plate, then move them together as your rig develops. One rear lever releases the assembly from Nebula’s grid, so changing the layout does not mean detaching every pedal from its mounting.
Mount once. Move together.
The plate stays attached to your pedal while you rearrange the board. Its mechanical lock locates the assembly on Nebula’s perforated grid. Choose the same grid holes to return it to a previous position, or a different set to try a new layout.
Attach the pedal. Keep the pull-tab within reach.
The intended pedal-to-plate attachment uses removable adhesive strips that release when stretched. Position the strips between the pedal base and plate, leaving their non-adhesive removal tabs accessible at a plate edge. Leave room to grip and pull the tabs without blocking the rear release lever.
There are two separate releases. For everyday layout changes, use the plate lever and move pedal and plate together. When you need to separate the pedal from its plate, take the assembly off the board, support both parts and slowly stretch each adhesive tab parallel to the plate surface. Follow the strip maker’s removal instructions; lifting or prying the pedal away is not the release method.
Removable adhesive strips release as the exposed tab is stretched along the surface. The exact strip specification for Nebula is still being evaluated, including grip and removal on the printed plate and different pedal finishes. Follow the strip maker’s surface preparation and load guidance. Use fresh strips when reattaching the pedal.
The latest family covers eight pedal footprints, from Mini to the full-size Quad Cortex. Carbon-fibre-reinforced bodies and soft TPU supports bring a stiff, lightweight structure and cushioned contact with the board.
How the lever lock works
- Lower. Align the plate with the board grid and press it gently against its supports.
- Slide. Move the plate downhill — a short, positive travel — until it seats.
- Lock. The lever engages automatically as the plate reaches its seated position.
To remove the assembly, hold the plate down, lift the rear lever and slide uphill to release. Every size has one rear release lever, positioned clear of the pedal footprint for comfortable access. Check actual pedal overhangs and cable routing when attaching the pedal.
Rigid where it carries the pedal, soft where it meets the board
A stiff, lightweight body printed in carbon-fibre-reinforced filament supports the pedal. The accessible rear lever makes it straightforward to release the assembly when your layout changes.
Soft TPU supports cushion the contact between plate and board, helping accommodate small variations in the coated surface.
Every size uses the same release action, so moving between plate formats feels familiar.
Eight sizes, one simple mounting system
Clear Rawrawk and NEBULA engraving, alongside readable size markings, makes each plate easy to identify. The full-size Quad Cortex plate also carries its own QUAD CORTEX engraving.
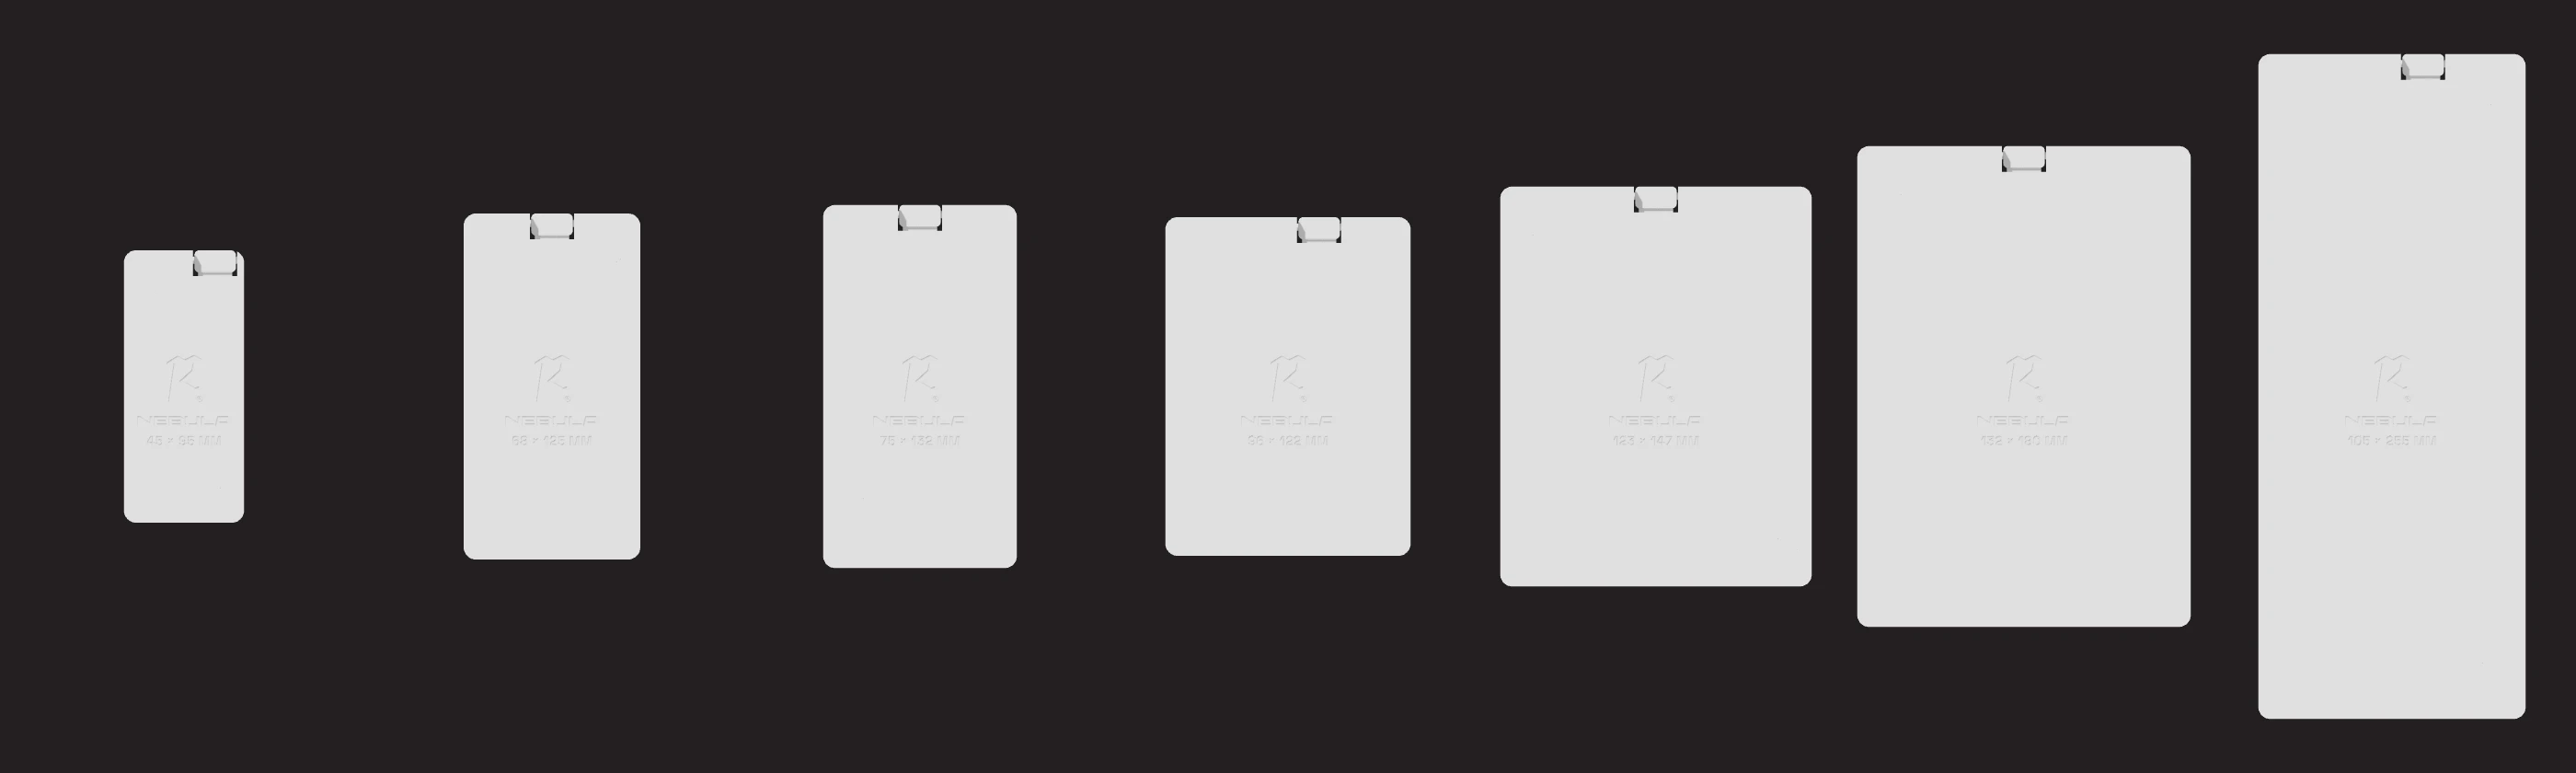
| Format | Pedal fit | Quantity | Release edge |
|---|---|---|---|
| Mini | 45 × 95 mm | 2 | Rear |
| Compact | 68 × 125 mm | 2 | Rear |
| Boss | 75 × 132 mm | 2 | Rear |
| Double-wide | 96 × 122 mm | 2 | Rear |
| Large | 123 × 147 mm | 2 | Rear |
| XL digital | 132 × 180 mm | 2 | Rear |
| Expression | 105 × 255 mm | 2 | Rear |
Not included; available at additional cost: a dedicated plate for the full-size Quad Cortex, with a 290 × 195 mm pedal footprint and 294 × 211 mm overall plate. Check the actual feet and mounting method; it is a flat plate, without model-specific foot recesses or screw holes.
These are fit envelopes, not a promise that every pedal marketed as “compact” will match. Measure the actual base and check the chosen fastening. The 14 pieces are an assortment for building and changing a rig; they are not a claim that all 14 fit on one board at once.
Plan the layout before choosing the mounting
The Nebula Builder stays focused on the pedals. Arrange the top and underside, enter equipment heights, reserve space for the rear sockets you intend to use, then save or export the plan.
Every Nebula includes 14 plates—two of each standard size. Additional plates cost extra, and the Quad Cortex plate is available separately at additional cost. If your pedals need something different, send the layout to Rawrawk for a separate custom mounting quote. The planner does not automatically assign or approve plates.
Underneath, include the mounting stack in the equipment’s installed height. Taller pedals have less usable depth beneath the sloping board; occupied fixing holes and connectors also need checking. A free patch of the drawing alone does not establish fit.
Where the design stands
The latest eight-size family has been verified in CAD for board fit, insertion and release across all sizes. Printed fit, repeated lever release, and adhesive holding and removal checks remain part of ongoing development. Ask us about current availability when enquiring.
Explore Nebula and the plate family →